 TechBlonhub A new digital technology era.

A flaky network cable can waste hours because the symptoms rarely point to the cable first. You see slow transfers, random disconnects, PoE devices dropping offline, or a link light that appears fine until traffic starts moving. If you need to know how to test ethernet cable runs properly, the goal is simple: confirm continuity, pair order, and real-world performance before you replace hardware that was never the problem.
How to test ethernet cable without guessing
The fastest way to test an Ethernet cable depends on what you are trying to prove. If you only need to know whether the wire map is correct, a basic cable tester is enough. If you suspect damage inside the jacket, intermittent faults, or speed negotiation problems, you need a more methodical approach.
That distinction matters. A cable can pass a cheap continuity test and still perform badly at Gigabit or PoE loads. Bent conductors, poor terminations, excessive untwist near the connector, and crushed cable jackets often show up as unstable throughput rather than a clean failure.
Start with the simplest checks first. Look at the cable ends closely. Bent RJ45 pins, loose boots, cracked latch tabs, or uneven conductor seating are common causes of trouble. If the cable was hand-terminated, check that the pair order matches T568A or T568B on both ends and that you did not split pairs just to make the colors line up.
The easiest method: use an Ethernet cable tester
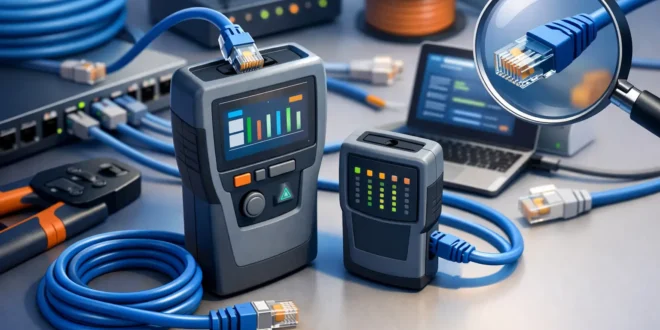
For most home users, IT staff, and small business setups, a cable tester is the right tool. Basic models verify continuity and wire mapping. Better models also detect shorts, reversals, split pairs, shielding faults, and sometimes cable length.
Testing is straightforward. Plug one end of the cable into the main unit and the other into the remote. Run the test and watch the LEDs or screen report each conductor. On a healthy straight-through cable, each pin should map cleanly to its matching pin in order.
If the result shows an open, one conductor is broken or not terminated correctly. If it shows a short, two conductors are touching somewhere along the run or inside the connector. A reversal means pins are landed incorrectly. A split pair is more subtle and often more serious for performance because continuity may exist while signal integrity does not.
What the tester results actually tell you
A pass result means the wiring layout is correct. It does not always mean the cable is certified for the speed you want. That is why bargain testers are fine for basic troubleshooting but not for validating new office cabling where performance matters.
If you are testing cables for access points, IP cameras, switches, or VoIP phones, pay close attention to intermittent results. Run the test more than once and flex the cable gently near both connectors. If the reading changes, the cable may have a broken conductor that only fails under movement.
How to test ethernet cable with a multimeter
A multimeter is not the best Ethernet test tool, but it can help if that is what you have on hand. It is useful for checking continuity on individual conductors when you suspect a break and do not have a dedicated tester.
You will need access to both ends of the cable and enough patience to identify each pin correctly. Put the multimeter in continuity or low-resistance mode. Touch one probe to pin 1 on one connector and the other probe to pin 1 on the far end. Repeat for each conductor.
This method can confirm whether a wire is continuous, but it has real limits. It will not reliably identify split-pair problems, signal quality issues, or whether the cable can sustain Cat5e, Cat6, or Cat6a performance. It also takes much longer than using a purpose-built tester.
For that reason, a multimeter is best viewed as a backup option. It is better than replacing cables blindly, but it is not a full answer if your network issue shows up only at higher speeds.
Test the cable through actual network performance
Sometimes the cable map is fine and the real problem is degraded performance. In that case, test the link in a live environment. Connect the cable between two known-good devices, then check the negotiated link speed in the operating system, switch interface, or NIC settings.
If a cable that should support Gigabit only links at 100 Mbps, that is a warning sign. Fast Ethernet can run on fewer pairs, while Gigabit needs all four pairs working properly. A damaged pair, poor crimp, or bad punchdown can force the connection to step down.
You should also transfer a large file across the link or run a network throughput test between two devices. Watch for sudden drops, retransmissions, or disconnects. This is especially useful when users complain that the network is “sometimes slow” rather than completely dead.
When link lights mislead you
A green or blinking port light is not proof the cable is healthy. Link lights only show that some level of communication exists. They do not tell you whether the cable is introducing errors, failing under load, or limiting speed.
This is one of the most common mistakes in troubleshooting. The cable looks connected, so attention shifts to the router, switch, ISP, or endpoint device. Meanwhile, the real fault is a damaged patch cable under a desk or a poor wall jack termination in the closet.
Common Ethernet cable faults to look for
Most failures come from physical stress, poor terminations, or installation mistakes. A cable pinched under furniture may still work for a while before performance degrades. Excessive bending near the connector can break conductors internally. Pulling cable too hard during installation can stretch the pairs and reduce signal quality.
Handmade cables often fail because the pairs were untwisted too far before crimping. That small detail matters more than many people realize. Ethernet depends on twisted pairs to control crosstalk and maintain signal integrity.
Another common issue is mixing standards at each end. If one end is terminated as T568A and the other as T568B, you have created a crossover cable. That is not always a problem on modern equipment with auto MDI-X, but it can still create confusion in environments that expect standard straight-through wiring.
If you are testing in-wall or long cable runs
Patch cords are easy because you can inspect both ends. Permanent runs are different. When you are testing wall jacks, ceiling drops, or long structured cabling runs, use a tester with a remote unit and, ideally, length measurement or fault distance features.
That helps you narrow down whether the problem sits near the patch panel, inside the horizontal run, or at the workstation end. If the tester reports a fault at a specific distance, you can save a lot of time by checking that part of the route first.
For business networks, this is where better tools start paying for themselves. A low-cost continuity tester works for quick checks, but certifying cable performance for new installs, high-speed backhaul, or PoE-heavy deployments requires more than a simple pass/fail light sequence.
When to replace instead of keep testing
Not every cable deserves extended troubleshooting. If a cheap patch cable fails continuity, drops links when moved, or negotiates below expected speed, replacement is usually the smartest move. The cable costs less than the time you will spend second-guessing it.
For installed cabling, the decision depends on access and impact. If the run feeds a critical AP, camera, or office workstation, it is worth isolating the exact fault. If it serves a noncritical endpoint and you have a spare route or can re-pull easily, replacement may still be faster.
A good rule is this: if the cable fails basic mapping, replace or re-terminate it. If it passes mapping but not real-world performance, test both ends, the connected hardware, and the negotiated speed before blaming the cable alone.
The tools worth keeping nearby
If you work on networks more than occasionally, keep a basic cable tester, a known-good patch cable, and a tone/probe set nearby. A multimeter is useful, but it should not be your primary Ethernet diagnostic tool. If you manage multiple offices or SMB infrastructure, step up to a tester that can detect split pairs and estimate cable length.
That small toolkit covers most real-world failures faster than trial and error. It also helps you separate cable problems from switch port faults, bad keystones, or device-side NIC issues.
When you test methodically, Ethernet problems stop looking random. Start with the physical cable, confirm the wire map, verify negotiated speed, and only then move up the stack. That approach saves time, cuts guesswork, and keeps a simple cable fault from turning into a much bigger network outage.